Are you interested in taking better and perfect photos? Is your photography need an extra edge?
Well, if you really have an interest in professional photography or it is just your hobby to take good pictures, then it is extremely important that you must have certain skills to improve your photography. At least you can take better portfolio photos of your own and you will finally find that your client work is being improved too.
But from where do you start? What are the tips to improve photography skills? What are the basics and what you can do to take your photography to the next level?
Just Relax! Here we present quick tips that will help you to improve your photography skills and get better and perfect photos right away. Apply these given photography techniques, and you will notice the result as quickly as you apply them. Just give it a try and I am sure you won’t be disappointed. You can always use a free image editing online tool though.
Video: Follow 7 Useful Tips To Improve Photography Skills
First, let’s check out this video and learn effective tips to improve photography skills…
1. Position Your Subject
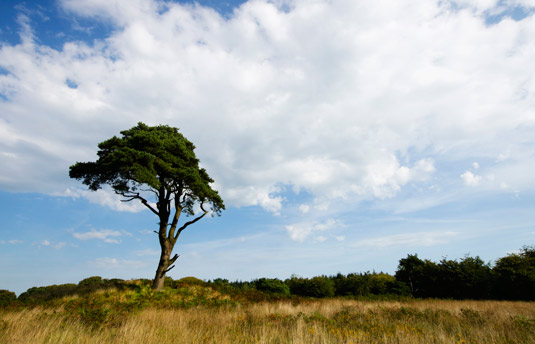
If you position your subject in the center then it often gives a very boring and static composition. Apart from selecting what to shoot and best settings, you must learn the basic of composition – it is one of the basic ways to enhance your results.
Although there are several rules and theories that could help you to make the perfect composition. However, the key lies during the time when you take your shots and you think about where to position your subject in your picture.
It’s simple, instead of keeping the subject in the middle, move it to one side and you will notice that it makes a more balanced image.
You must apply the typical approach – that is to divide each side of the photo into 3 equal size areas. After that you must position your main subject on one of these lines or where they crisscross.
2. Get Close to Subject

While you shoot picture then try to get as close to your subject. If you are able to do so then you not only get close but you are able to fills your frame with focus on your subject and it becomes a most important element in the shot. Some point-and-shoot cameras do not come with the best lenses and hence you have to do this so that you can completely fill the frame with your subject.
3. Sharpen Your Shots
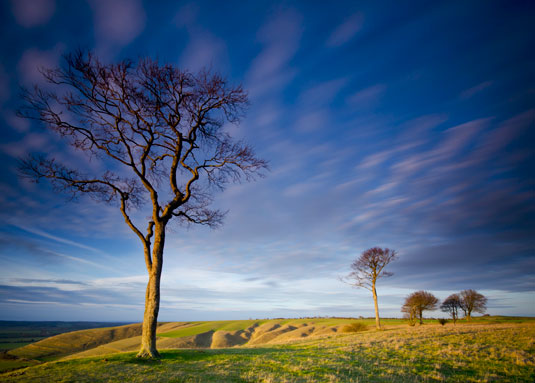
When you go for sharpening a shot, it is advised that you should always use the smallest amount that creates the detail in your shot sharp and crisp.
It is true that sharpening your images more will give you sharper images, but it takes time and also you have to master in this area. You have to practice some restraint or else you will end up with increase noise and ugly pictures.
The main common reasons behind the over-sharpening is applying it in wrong stage in your processing and also applying it to the photo that is already sharpened. If you are taking JPEG images, then it might have sharpened already in-camera, hence you have to be careful while you apply extra sharpening.
RAW files are not applied with sharpening in-camera, but you can apply it while editing it in image editing software. If you have decided that you are going to apply the sharpening while editing your shots then it is better that you TURN OFF any in-camera or raw conversion sharpening.
Bonus Tips – If you are applying sharpening to your photo using Photoshop’s unsharp mask filter, then as a beginner point – you should try to use an amount between 50% and 80%, and a radius of 1 and threshold of between 2 and 5.
4. Make Use of Saturation

In the Hue or Saturation window, use the drop-down menu – it will allow you lessen the saturation of particular colors, without losing detail.
Just like sharpening, saturation also requires extra care just to avoid your photo looking brassy and ugly. There are many scenes in which you will find that some colors are more saturated than other, particularly the red and green color hence, instead of saturating the whole image, you should aim for specific colors using the Hue/saturation control.
5. Take Control of Focus

Make use of particular AF points to target on off-center subjects.
Simply leave your camera to focus on the subjects and it will automatically focus using the central focus point. This will create the sharp images in many.
Use individual AF points to focus on off-centre subjects conditions, but if you want more creative image, then you should take control over the focus point. After all, your subject will not be always in the center of the frame.
So you have to first learn on how to get your camera to focus on precisely the point that you want to be sharp. Camera comes with several number of focus points available across the frame that you can see through the viewfinder and these provide outstanding solution to focus on OFF-Center subjects. You should set your camera to single-point autofocus mode, instead of setting it to multiple or automatic selection.
Also Read:- 10 Common Mistakes Made by New Photographers
6. Focus on Moving Subjects

If you are taking photos of moving subjects then you should have knowledge of which focus mode you should use. Here in this situation, you should make use of Continuous Autofocus Mode. Now both digital SLRs and point-and-shoot models have this feature.
For this, you need to change the Autofocus Mode form Single or One shot to Continuous or AI Servo Mode. You can activate this mode from your camera Menu. This mode will allow you to keep taking photos while you hold down the shutter button. This mode is also helpful while taking pictures of action sequences.
Bonus Tip: Why My Image is Blurred?
If you are taking pictures that aren’t sharp or blurred then you should know the reasons why is it so? This can be due to incorrect focusing however, it can also be due to subject moving or camera shakes. In this situation, you need to spot the mistake, fix the issue and then try again.
Also Read:- 7 Common Digital Camera Errors & Their Solutions
7. Adjust White Balance Correctly
If you choose the daylight white balance preset then it will offer good balance blue skies and warm foliage.
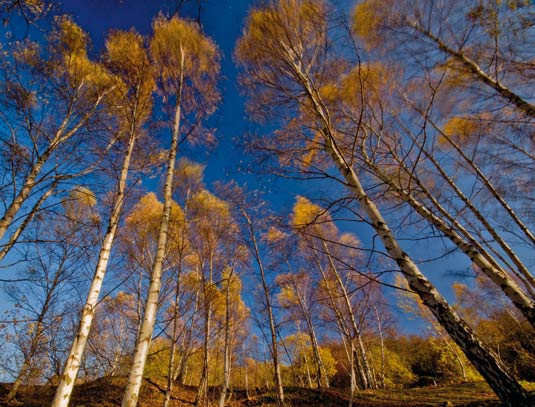
Many photographers forget about setting the correct white balance, particularly when you are shooting in raw, and then you can set it when you process your photos later. But if you really want to get best results then you can enable the right white balance in-camera.
The camera’s Automatic White Balance setting usually does a good job in capturing the colors in various lighting situations, but you can’t say that it is perfect.
To get the best result, you need to use preset values manually, when your subject is dominated by single color like a blue sky, orange sunset, or in large spread green grass.
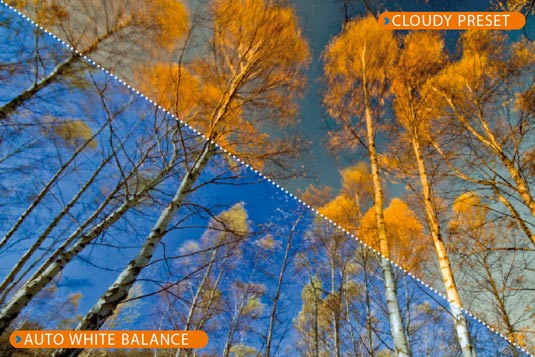
The Automatic setting eliminates some of the warmth, while the cloudy preset over-emphasises it.
In these conditions, Automatic White Balance can set a value to neutralize this problem of strong color, and therefore you will get better results if you select and adjust the white balance settings that suits lighting situations like Sunset, Sunrise, or Shadow.
Bonus Tip: Set A Custom White Balance
Try with a grey subject that fills the entire frame (you can take a piece of card) and take a shot in the same position as the subject you want to. After this take another shot with your camera Preset Manual or Custom white balance setting. You will definitely be going to see the changes in both images.
8. Handle High-Contrast Lighting
How you will deal with the high-contrast lighting situation? How you can take the maximum range of tones?
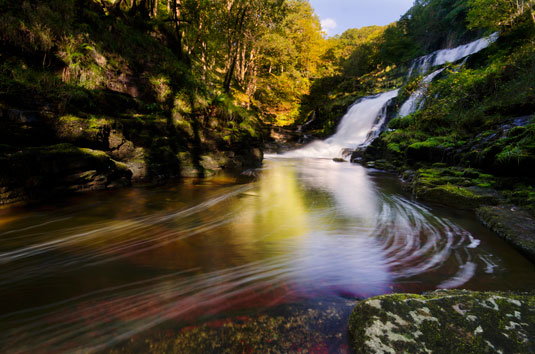
If you are using SLR’s Exposure Compensation setting to adjust overall exposure then it can easily handle the situation in many conditions, but there are conditions where high-light/brightness of the subject is much larger for your camera and hence you camera is unable to capture detail in both high light and Shadows.
It is called camera’s Dynamic Range that differs among different models, it is quite common to discover scenes where the contrast is greater that even the best cameras can’t cope with it.
If you practice regularly then you will identify these situations before you begin to shoot, however, the best way to identify the situation is to review your shot and check the highlight and histogram warnings.

The above two image, one taken at -1 exposure and another is taken at +1. By mixing the under and over exposed shots that gives the image with detail in both shadows and highlights.
Started by capturing the shot and checking the shadows comes to the left of the graph. After this you can activate the highlights warning display. If your camera display blinks just to indicate that there are highlights without any details then your camera will not be able to capture the whole brightness range.
To fix this problem, there are several numbers of ways to fix it. Many cameras come with in-built system to capture more shadow/highlights detail than normal photos. The Canon System is Auto Lighting Optimiser and Nikon version is known as Active D-lighting.
You Might Also Be Interested In:- How to Choose a Digital Camera – Guide To Buy A Perfect One!
9. Exposure Compensation Techniques
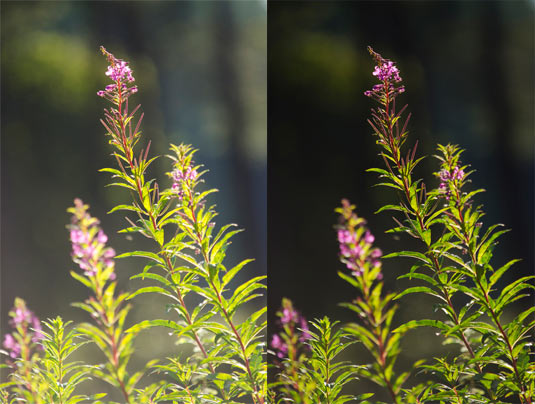
If you are capturing the subjects with dark background then it can cause your camera to over-expose the shot. However, dialing in negative exposure compensation resolves this issue.
It is quite confusing whether to increase or decrease the exposure of your shot because you have to adjust the situation just opposite. Well, below find out how to use your camera’s Exposure Compensation to darken or lighten your photo.
If the subject contains mostly dark color, you may find that your camera will over-exposed your scene, hence you have to reduce the exposure. Press and Hold the Exposure Compensation button, decrease the exposure by turning the dial left to enter the value of -1, then take the shot again.
If the subject contains mostly light color, you may find that your camera will under-exposed your shot, hence you have to increase the exposure. Press and Hold the Exposure Compensation button, increase the exposure by turning the dial right to enter the value of +1, then take the shot again.
10. Make Good Use of Space
If you give the subject room in the frame to move is generally the best composition. This technique comes handy when you shoot moving objects such as animals or portraits.
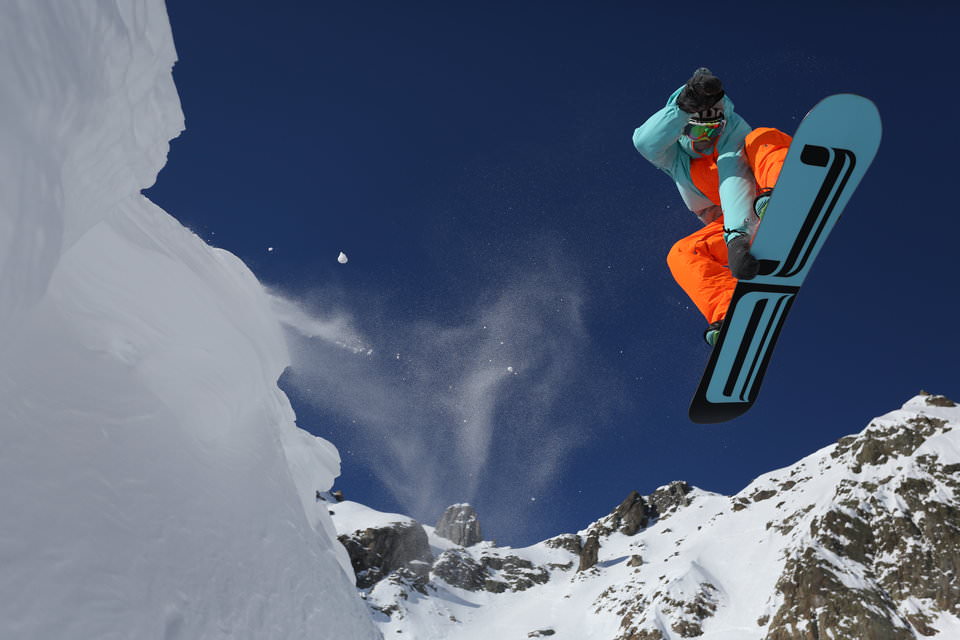
The space near your subject is as important as your subject to make your composition success. You need to first think about the how much space you want include to your subject in your shot.
Well, this is not the accurate science, however as universal rule, you should include the surrounding, if they add beauty to the photos. If you are taking wildlife or portrait images photos then you can show the environment around the subjects.
If you leave little amount of space for the subject to ‘move’ or ‘look’ into then your image can look restricted.
Using space in your shot is best and it is the key aspect that is particularly applicable to moving, action and portrait shots. When anyone looks at pictures that are moving, then people naturally look forward into the area that it is moving ahead.
Because of this, it is best idea to leave more space ahead of the subject so that it looks like it is moving forward and not behind, or else your picture will look unbalanced. Same techniques apples for portrait too – leave some space on the side towards your subject is looking into quickly generate considerably more balanced composition.
11. Try Unusual and Different Angles
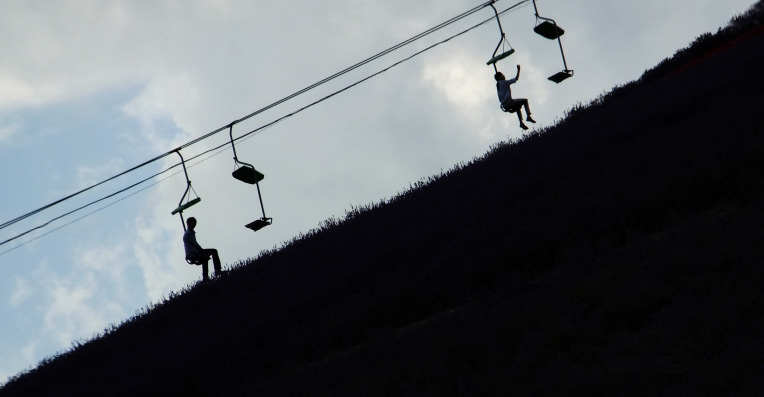
It is suggested that you should not always directly face your subjects. Some of the great photos are created when you are trying some different experiment. You can try these angles – Go high, low down, move to the side or try to place something in front of the camera and then take a shot. Well, I am sure you will look little strange while you do this, but your photos will come more creative and outstanding.
12. Capture As Many Photos As You Can
Are you taking maximum advantages of your camera? If NO then begin to start taking most out of it. Take as many photos as you can at one position and later you can delete the bad ones. So go ahead and keep shooting away. In this way you will have more chances to select the best photos out of those taken shots. Just for your example I shoot as many as 40-50 photos and select only 4-5 best photos from the entire set.
Lost your Important Photos from your Camera? Follow the instructions mentioned here:- How to Recover Deleted Photos from Camera Card
Conclusion
So these are some photography useful tips and tricks that you can follow to improve your photography skills and take better photos. I hope with these quick and Easy tips you will become a good photographer within a few practice of mere hours.
Also Read:– 10 Hot Photography Tutorials
So, what are you waiting for just pick up your camera and start enjoying shooting!
If you have found this post helpful and useful, then please do not forget to share it.
Also like and follow us on Facebook, Twitter and Pinterest to get latest updates.
Taposhi is an expert technical writer with 5+ years of experience. Her in-depth knowledge about data recovery and fascination to explore new DIY tools & technologies have helped many. She has a great interest in photography and loves to share photography tips and tricks with others.