In this era, numerous Windows users switched to the Mac operating system due to its seamless integration of hardware and software. Although Mac (Macintosh) is a great OS, people may love to use the Windows operating system on Mac concurrently to enjoy both worlds. While running Windows OS on Macintosh, users may experience a “Boot Camp Assistant- Your bootable USB drive could not be created” error.

In this blog, we’ll explore the insights of this error, its common causes, and most significantly how to troubleshoot it with the best fixes.
Free USB Drive Data Recovery Tool.
Recover data from USB drives, Pen drives, SSDs, HDDs, and other devices on Mac. Try now!
Is It Safe to Run Windows on Mac Boot Camp?
Yes, running Windows on a Mac using Boot Camp is generally safe and many users have successfully done so for years. Boot Camp is an official Apple utility designed to allow Mac users to install & run Windows on their Macintosh devices.
Why Does It Say Your Bootable USB Drive Could Not Be Created?
Various reasons can contribute to this error, including:
- USB format isn’t compatible with macOS
- Insufficient disk space
- The bootable USB isn’t recognized in the BIOS
- Hardware or software conflict
- The screen stuck on a boot menu screen during the process
- Corrupt ISO File
- Using an outdated version of macOS.
How to Solve Your Bootable USB Drive Could Not Be Created Bootcamp Error?
After understanding the roots, now it’s time to apply the potential methods to overcome this situation:
Method 1- Check the Storage (RAM) of Mac
The foremost reason for the ‘there is not enough space available on the disk’ error is due to insufficient disk space. All you need to do is to ensure that there’s enough space on your USB drive (at least 16GB) to use Boot Camp & for better accessibility.
Also Read: Fix “Couldn’t Unmount Disk” Error on Mac [4 Ways]
Method 2- Update Macintosh Operating System
Running an outdated version of the operating system can cause various errors and incompatibility issues on your Mac device. Therefore, get the latest update on your macOS to fix this error. Installing the most recent update of the OS always contains bug fixes.
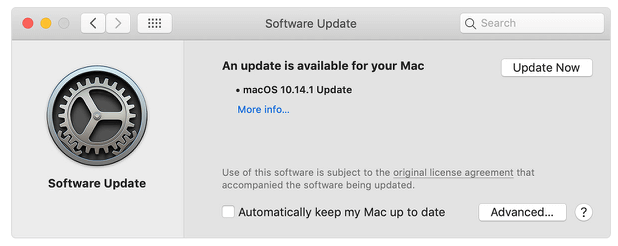
Here are the complete steps to update Mac OS:
- Open the “System Settings” in the Dock. (Instead, go to the Apple menu and then System Settings.)
- Then, navigate to General then Software Update >> Check for updates.
- After this, click on the Update now button if there’s any new update available then it will automatically get installed.
Method 3- Unmounting ISO Image File
Many users have reported that “Bootcamp your bootable USB drive could not be created” error has occurred due to the mounted ISO file on your Mac system. You can ultimately fix that by unmounting the ISO file. Follow the below steps to do so:
- On your PC, look for a drive with the mounted ISO file.
- Next, right-click on that file and select Eject.

- Now, launch the Boot Camp Assitant to create a bootable USB.
If this method fails, try the next one to solve this hurdle.
Method 4- Reinstalling Latest Windows Version
This specific error not only occurs due to running an outdated macOS but it can also result in incompatibility between the Windows version installed and Mac/MacBook.
To fix this problem, opt for installing the latest version of Windows by following the below steps:
- On your desktop, visit Microsoft’s official website to download the most recent Windows version.
- Now, return to the desktop & click on
- Next, you have to navigate to Applications >> Utilities.
- Click on the ‘Boot Camp Assistant’
- Select the ISO files you download and click Continue.
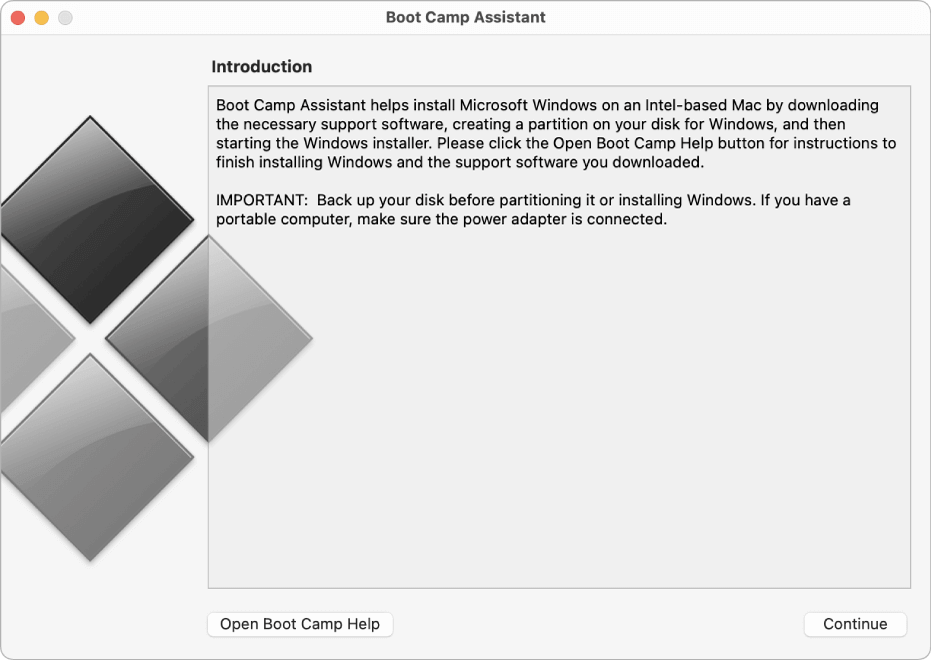
- Partition your Mac’s disk and then follow the on-screen instructions to operate.
Also Read: Time Machine Can’t Find Backup Disk On Mac? Here’s How To Fix!
Method 5- Make Another ISO Image File with Windows
Even after trying the above solutions, if the error your bootable USB drive could not be created bootcamp persists, you can create a Windows Boot Camp USB installer to get Windows 10/11 installed on your Mac PC.
Here’s how you can do so:
1- Erase a USB you will use as the bootable image.
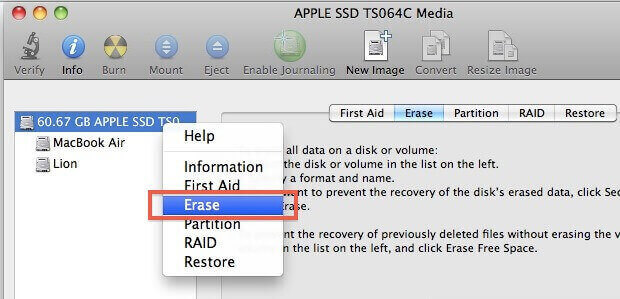
- Launch Disk Utility.
- Choose the wanted disk.
- Now, click on Erase as the MBR or FAT32 file.
2- Download & save the Boot Camp Assitant drivers from an Apple to a USB flash drive.
3- At this time, copy all the files from your Windows ISO to a flash drive.
4- Then, create a FAT32 partition with the help of Disk Utility.
5- Launch your PC from a drive & choose the FAT32 partition as a destination.
Method 6- Check Hardware Issues to Fix Your Bootable USB Drive Could Not Be Created Error
Last but not least, if your device is experiencing hardware-related problems with the USB port or drive itself, try using a different USB port. Besides, you can even use a different PC to create the bootable drive.
That’s it.
What If Your USB Drive Data Gets Deleted While Fixing This Error?
While applying the above solutions, it is possible that you may lose your crucial USB drive data. In such a situation, you can go with USB Hard Drive Recovery for Mac to recover your important stuff from the disk. This program will scan the entire storage system and recover lost data (photos, audio, and videos) from Mac OS with ease.
emid emid
emid
* Free version of the program only scans and previews recoverable items.
Steps to use this Software:
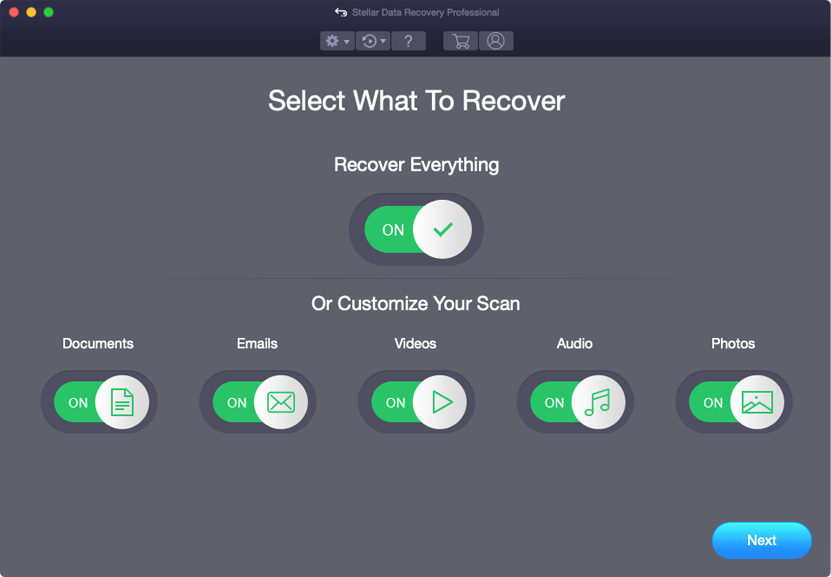
Step 1: Select Type of Data
First of all, you have to select the type of file you want to recover and then click on 'Next' option.
Step 2: Select Location
Next, you have to select the storage drive from where you have lost the data.
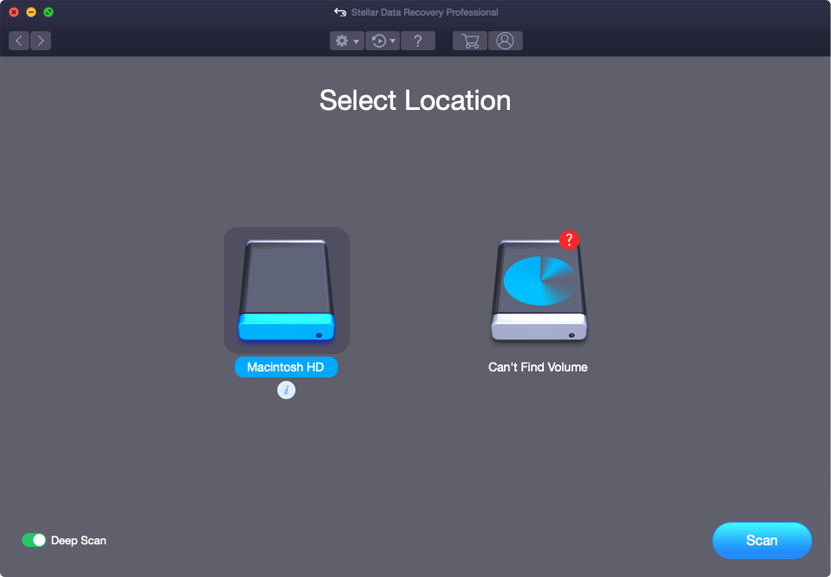
Step 3: Scan & Recover
After selecting the storage drive, you have to Scan, then Preview and after that Recover the files from Mac storage disk.

Related FAQs:
The Boot Camp say I don't have enough space because this assistant is having trouble storing your boot disk data to a single partition.
Yes, you can install Windows on the Mac computer without Boot Camp. There are plenty of 3rd-party tools available that can help users to do so.
You can create a bootable Windows USB in Boot Camp by following the below steps:
Yes, you can use a USB flash drive for Bootcamp. Why Does Boot Camp Say I Don't Have Enough Space?
Can You Install Windows on Mac Without Boot Camp?
How Do I Create a Bootable Windows USB In Boot Camp?
Can I Use A USB Drive for Bootcamp?
Don’t Miss: [SOLVED] Your Computer Restarted Because Of A Problem Mac
Closure
It’s time to conclude…
Above, we have conferred the best fixes to troubleshoot your bootable USB cannot be created there is not enough space available on the disk error. All the provided resolutions are very effective to perform & you can try them according to your situation.
I hope the aforesaid tactics will certainly help you to solve this problem on a Macintosh PC.
All the very best…

Taposhi is an expert technical writer with 5+ years of experience. Her in-depth knowledge about data recovery and fascination to explore new DIY tools & technologies have helped many. She has a great interest in photography and loves to share photography tips and tricks with others.