Have you lost or accidentally deleted photos from your Sony Alpha DSLR camera? Are you looking for the solution of photo recovery from Sony Alpha DSLR camera that can easily restore your lost/deleted pictures from Sony camera? If “Yes” then here you will get the best and the easy solutions that will help you to retrieve photos from Sony Alpha DSLR Camera.
Scenario for data loss has become so common nowadays with the vast use of digital cameras. Sometimes you may lose photos from DSLR cameras by simply pressing “Delete All” accidentally, format the camera memory card mistakenly, mishandling of camera or memory card error. All these situations may lead you to lose Sony DSLR camera photos unintentionally.
When you delete or lost photos, then the first thing you need to do is that you must stop using your camera and its memory card immediately. It is because if you add any new data on it, then it will overwrite the existing data. Before you try to recover lost images from Sony Alpha DSLR camera, you need to first know some common causes due to which you lose digital photos.
Reasons For Data Loss From Sony Alpha DSLR Camera
Losing photos from Sony Alpha DSLR camera is not easy to tolerate. It really hurts…. However, whenever data is lost, there are some reasons behind it. And it is very important to notice those causes which lead to such conditions. Some of them are mentioned below:
Human errors– Some of the data gets deleted from devices by users in the following ways:
- Data get lost by pressing cut+paste command
- Using Shift+Delete key to delete folder/files
- Sometimes while saving data or transferring, camera is switched off
- Accidentally pressing ‘format’ or ‘Delete all’ option during previewing pictures
- When the battery is low and clicking pictures at that time
- Ejecting the memory card at the time of copying data
Memory card damaged– Most of the times the card gets damaged or corrupted because of mishandling. While data transfer process, if the card is removed from digital device then it is sure that data will be lost.
Data is not accessed– Many times some error pop-ups when your device is connected to PC. These pop-ups occur that can make memory card inaccessible.
Power cut– Suddenly power fails while any data is copied from storage device can lead to data loss.
Now after knowing the digital camera photos loss, it’s time to go through the solution for photo recovery from Sony Alpha DSLR camera. Generally, we use memory card in the DSLR camera and if the images have been lost from the digital camera memory card then you can try the below methods to restore lost images from Sony DSLR camera.
Methods To Recover Photos From Sony Alpha DSLR Camera Memory Card
Method #1: Try CHKDSK Command Prompt
Method #2: Change Memory card Drive Letter Name
Method #3: Use Disk Management To Format Memory card
Method #4: Re-Install Card Reader Driver
Method #6: Repair Undetected or Unrecognized Memory card With CMD
Method #7: Use Digital Camera Photo Recovery Tool
Method #1: Try CHKDSK Command Prompt
Sometimes, you might face some error issues in your memory card and it is unreadable to your personal computer/laptop, then there is another alternative option to solve your problem. What you have to do is to run the CHKDSK Command Prompt and given below are the steps to perform this:
- First, you have to right click on the My Computer
- Go to Manage
- Select the Disk Management
- Locate your device in the external driver viewer and from here check whether you’re memory card is readable or not.
- If your memory card is readable then it’s ok or if it is not detected then follow the procedure of check disk option, i.e. run the CHKDSK Command Prompt from Run
- Now, press Windows + R key to open the Run
- To do this, type cmd the Run command and press Enter.
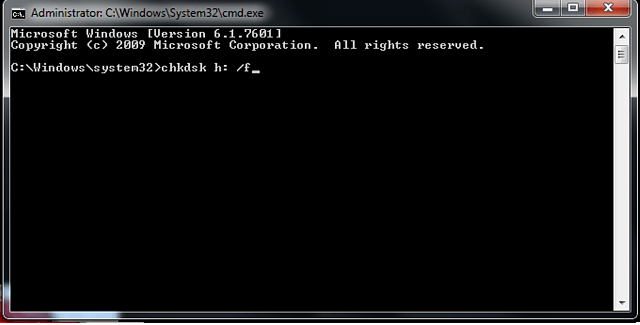
- Your CHKDSK Command Prompt will appear on the screen.
- Here you have to type chkdsk D:/f and press Enter.
- Else, you can also type chkdsk D:/f offlinescanandfix and press Enter key.
- By performing this, your issue will get resolved.
- Hence, your memory card is readable again.
Method #2: Change Memory card Drive Letter Name
If you are unable to view your memory card but it is showing in Disk Management option, then kindly change the letter name of your Memory card and the steps are given below:
- First, insert your memory card into the card reader.
- Then connect the card reader to your personal laptop or computer.
- Go to Start menu of your system.
- In the search address bar, type Disk Management.
- Click and open the Disk Management
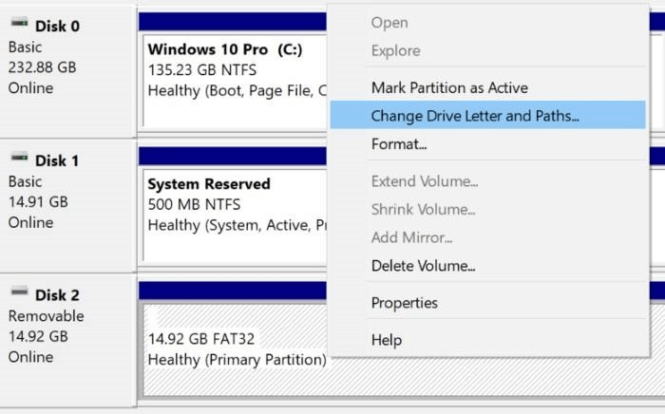
- After that right click on your memory card and select the option Change Drive Letter and Paths for making changes.
- Now, you can easily rename your memory card drive letter name.
- Lastly, click the OK button to apply the changes.
[Note]:- Don’t forget to check whether your memory card is functioning properly or not. If your issue has not resolved, then kindly reinstall your reader driver once again.
Method #3: Use Disk Management To Format Memory Card
Some people have also asked – How do I format damaged memory card that makes it unreadable or unrecognized on Windows PC, Android phone or digital camera? Well, in that case, follow the below steps to format the damaged memory card:
- First, connect your damaged memory card to your Windows computer.
- On Your PC, click Start and then right-click on “This PC” or “My Computer” and then select “Manage”.
- On the left side, click on “Disk Management”.
- Now right click on the memory card and click on “Format” option
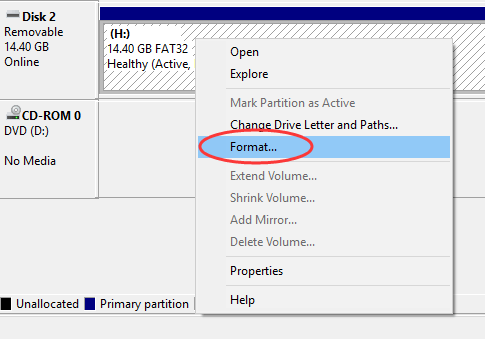
- Perform a quick format.
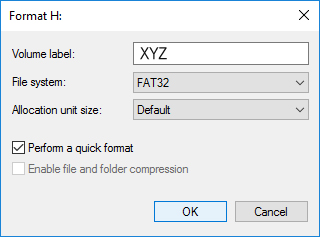
Now after performing these above steps, wait for the format process to get complete.
Method #4: Re-Install Card Reader Driver
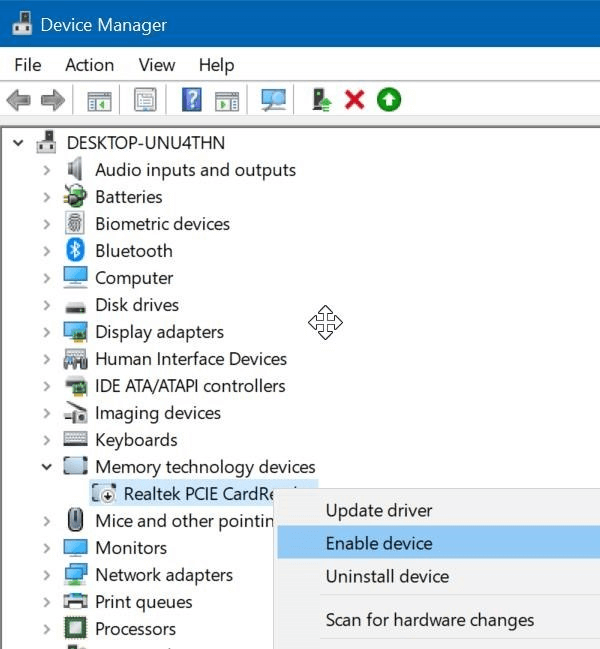
You can also try reinstalling your card reader driver to fix this issue. Following are the steps given below to reinstall your card reader driver:
- Go to Start menu of your system.
- Click on the option Device Manager and open it.
- In Device Manager, choose the memory technology device
- From here you can note down the details of your card reader and after that, you can download a fresh copy of your drivers from the original website of the esteemed card reader.
- Now, after your card reader model is enabled, then right click on your card reader and select the option Uninstall device from here.
- Restart your computer or laptop after your card reader driver gets uninstalled.
- After that run the setup of the downloaded card reader driver and follow the complete installation steps.
- Lastly, kindly check that your memory card is displaying or not.
[Note]:- If all the above method fails to solve your issue then the alternative option left is to format memory card or Memory card.
But if you will format your memory card, then you will lose all the data that are stored in your external storage drives like memory card or USB flash drive. Thus, it is suggested that you should always keep a backup of your data to other locations or any external storage devices so that you can easily perform external storage data recovery.
Method #5: Update Memory Card Driver
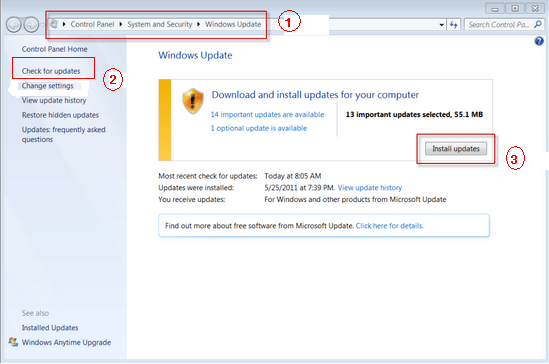
If your memory card driver is not updated, then there is a possibility that your personal computer/laptop will not be able to detect your memory card driver. Thus, in this situation you have to update your memory card driver and make it legible again and to perform this, you have to follow the steps given below:
- Connect your memory card with your personal computer or laptop and then right on the My Computer
- In My Computer, choose the Manage option to proceed.
- Now, just click on the Device Manager option on the left side of the taskbar.
- Select the USB Serial Bus Controllers option and click on the plus “+” sign symbol.
- After this, you will find that a yellow color exclamation mark will appear on your screen.
- Now, choose the option Update Driver Software by right-clicking on it.
- Then click on the option Search automatically for updated driver software.
- Let all the drivers get installed and after the installation is completed, then kindly reboot your system.
[Note]:- Lastly, after all the steps are done then it will no longer give you error like unreadable memory card will be easily readable on your personal computer/laptop.
Method #6: Repair Undetected or Unrecognized Memory card With CMD

There are people asking – How do I repair corrupted memory card that is not recognized by Windows PC? Well, if this is the case with you, then you can repair corrupted Memory card and get rid of the undetectable, unrecognized or unreadable memory card issue by running CMD command.
Here are the steps that you can follow to repair memory card with CMD prompt:
- Insert undetected or unrecognized memory card into card reader and connect it to Windows computer.
- On your PC, click START, type “CMD” in search bar and hit ENTER. A new command prompt window will get open.
- Now type the following command: “chkdsk /X /f H:” or “chkdsk H: /f” and hit ENTER. Here you need to replace H: with your memory card letter name.
After this windows will look for the corruption and if any corruption found then it will fix Memory card issues and recover data from it. On successful completion of the process, you can re-use your memory card without any issue or error.
Method #7: Use Digital Camera Recovery Tool
In order to recover deleted pictures from digital camera memory card, you can apply this third-party tool like Sony Camera Recovery Tool. It is specially designed for the photo recovery from digital devices like digital cameras, USB flash drives, external hard drives, memory card and so on manufactured by different brands.
It is very efficient and fast tool, able to recover all types of media files like photos, videos and audio files from different digital devices on Windows and Mac. This tool is designed for the normal user and one can easily operate this tool without knowing any technical knowledge.
Supported Sony Camera Models – DSLR-A850, DSLR-A900, SLT-A99, DSLR-A100, DSLR-A700, DSLR-A200, DSLR-A300, DSLR-A350, DSLR-A330, DSLR-A500, DSLR-A230, DSLR-A380, DSLR-A550, DSLR-A290, DSLR-A390, DSLR-A450, DSLR-A560, SLT-33, SLT-A55V, SLT-A35, SLT-A55, SLT-A65V, SLT-A77V, SLT-A65, SLT-A77, SLT-A37, SLT-A57, SLT-A58 and many more.
emid emid
emid
* Free version of the program only scans and previews recoverable items.
Steps To Retrieve Photos/Pictures/Images From Digital Camera Memory Card
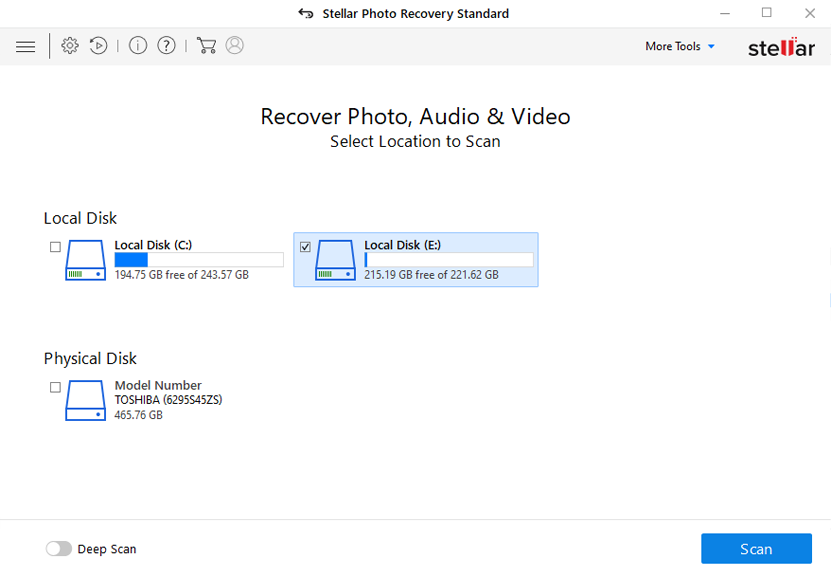
Step 1: Select Desired Location
Firstly, select the drive, external media or volume from which you want to recover deleted media files. After selecting, click on 'Scan'.
Step 2: Preview Recovered Media Files
Next, you can preview the recoverable media files after the scanning process is completed.
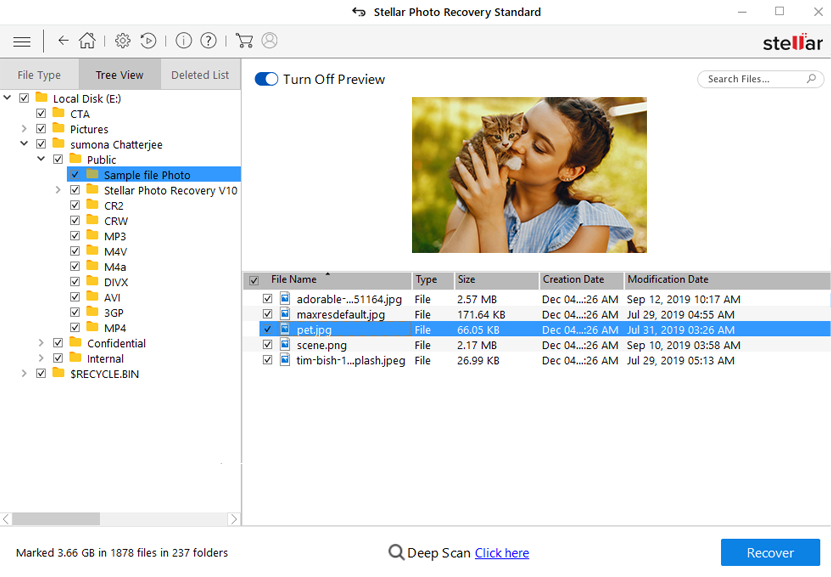
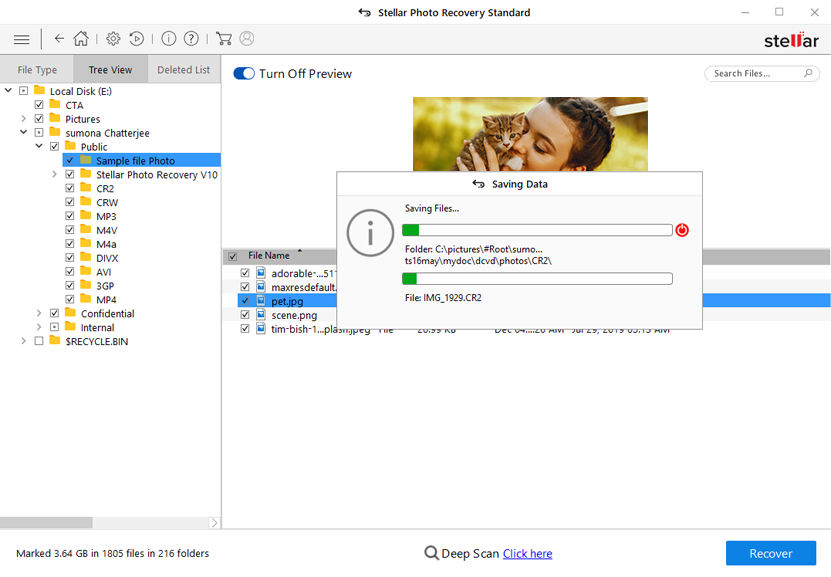
Step 3: Recover Media Files
Lastly, you can select the images, audio, video files you want to restore and click on 'Recover' option to save them at the location you want.
Conclusion
I hope after trying the above methods mentioned above to recover deleted photos from Sony digital camera will be helpful for you. Or, even after trying the above fixes, you will be unable to restore lost images from Sony Alpha digital camera, you can try Sony Camera Recovery Tool and get back all your lost pictures from Sony digital camera.
So, do not waste your time anymore and just try the recovery methods available here and get your problem solved. You don’t need any technical knowledge to perform these steps as they are so easy to perform. So what are you waiting for…just go for it….All The Best.
If you have found this post helpful and useful, then please do not forget to share it.
Also like and follow us on Facebook, Twitter and Pinterest to get latest updates.

Taposhi is an expert technical writer with 5+ years of experience. Her in-depth knowledge about data recovery and fascination to explore new DIY tools & technologies have helped many. She has a great interest in photography and loves to share photography tips and tricks with others.